
The Ultimate Chocolate Crepes Recipe: Sweet Breakfast Magic
Every weekend, my kitchen comes alive with the magic of chocolate crepes that bring pure joy to lazy mornings.
Weekend brunches transform when these delicate treats slide onto warm plates.
Crisp edges and soft centers create a delightful contrast that makes everyone smile.
Mixing cocoa into classic crepe batter delivers unexpected richness and depth.
Light whisking creates a silky smooth texture that practically guarantees deliciousness.
French culinary traditions inspire this simple yet elegant breakfast marvel that feels like a gentle hug.
Grab a skillet and let’s make breakfast memories together!
Chocolate Crepes That Roll Up All the Flavor You Crave

Whip Up Crowd-Pleasing Chocolate Crepes:
Quick and Easy Preparation: Master this recipe in under 30 minutes, perfect for spontaneous dessert cravings or last-minute entertaining.
Versatile Dessert Delight: Customize with endless filling options like fresh fruits, chocolate sauce, whipped cream, or nutella to suit every taste preference.
Kid-Friendly Cooking Adventure: Engage children in the fun cooking process – they’ll love helping spread batter and choosing delicious toppings while learning basic culinary skills.
Impressive No-Fuss Elegance: Create restaurant-quality dessert that looks sophisticated yet requires minimal technical cooking expertise, making you feel like a professional chef without complicated techniques.
Chocolate Crepes: Ingredient Breakdown
Dry Ingredients:Wet Ingredients:Cooking and Serving Ingredients:Chocolate Crepe Instructions for the Perfect Fold
Step 1: Whisk Dry Ingredients
Combine flour, cocoa powder, sugar, and salt in a medium mixing bowl.
Use a whisk to blend these ingredients thoroughly, ensuring no clumpy spots remain.
The dry mix should look evenly colored and smooth.
Step 2: Blend Wet Ingredients
In a separate large bowl, blend these liquid components:Whisk everything until the mixture looks completely smooth and slightly frothy.
Step 3: Create Batter
Slowly pour dry ingredients into wet ingredients.
Whisk continuously to prevent lumps from forming.
The final batter should look silky and have a thin, runny consistency similar to heavy cream.
Step 4: Rest Batter
Allow batter to sit at room temperature for 15-30 minutes.
This resting period helps ingredients settle and creates more tender crepes.
Step 5: Prepare Cooking Surface
Heat a non-stick skillet or specialized crepe pan over medium heat.
Lightly grease surface with a thin butter layer.
Step 6: Pour and Spread Batter
Ladle about 1/4 cup batter into pan’s center.
Quickly tilt and rotate pan to spread batter into a thin, even circle.
Step 7: Cook First Side
Cook until edges start lifting and bottom looks set, approximately 1-2 minutes.
Surface will appear slightly dry.
Step 8: Flip and Finish
Carefully flip crepe using a thin spatula.
Cook opposite side for 30-60 seconds until lightly golden.
Step 9: Stack Crepes
Transfer cooked crepe to a plate.
Place parchment paper between each crepe to prevent sticking.
Step 10: Serve and Decorate
Fill crepes with preferred toppings:Roll or fold crepes.
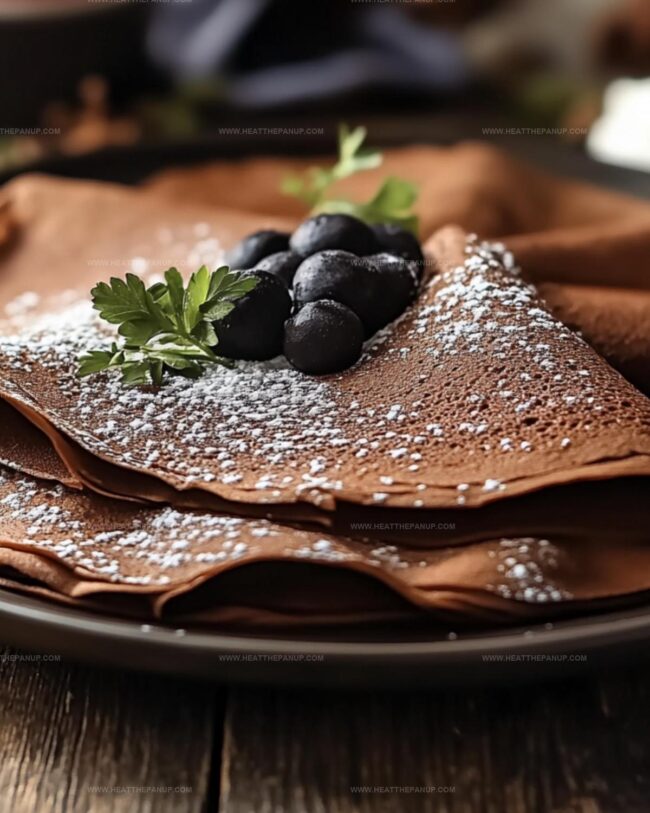
Dust with powdered sugar and add extra garnishes as desired.
Crêpe Cooking Tricks for Chocolate Lover’s Perfection

Storing Guide for Chocolate Crepes
Best Chocolate Crepes Serving Ideas
Chocolate Crepe Companion Pairings:Chocolate Crepes with Topping Tweaks
FAQs
Resting allows the flour to fully absorb the liquid, which helps prevent lumps and creates a smoother, more tender crepe texture. It also lets the gluten relax, making the crepes more delicate and easier to handle.
Yes, you can prepare the batter up to 24 hours in advance. Cover and refrigerate it, then give it a gentle whisk before cooking to ensure it’s well-mixed. The batter might thicken in the fridge, so you can add a little milk to thin it out if needed.
Look for visual cues: the edges will start to lift slightly, and the surface will look less wet and more matte. The underside should be golden brown. This typically takes about 1-2 minutes on medium heat.
The first crepe is often considered a “test crepe” and might not be perfect. This is normal! Adjust your heat and technique with subsequent crepes. Each one usually gets better as you go along.
Print
Best Chocolate Crepes Recipe
- Total Time: 30 minutes
- Yield: 4 1x
Description
Silky smooth “best chocolate crepes” whisper indulgence from French culinary traditions. Delicate chocolate-infused batter creates elegant layers that melt deliciously on your palate, promising a luxurious breakfast or dessert experience you’ll savor completely.
Ingredients
Main Ingredients:
- 1 cup (240 ml) all-purpose flour
- 1 1/2 cups (360 ml) whole milk
- 2 large eggs
Chocolate and Sweeteners:
- 2 tablespoons unsweetened cocoa powder
- 3 tablespoons granulated sugar
- 2 tablespoons unsalted butter, melted
Additional Flavoring and Seasoning:
- 1/4 teaspoon salt
- 1 teaspoon vanilla extract
Serving Optional Ingredients:
- Fresh berries (strawberries, raspberries, or blueberries)
- Whipped cream
- Chocolate syrup
- Powdered sugar
Instructions
- Craft a silky, decadent chocolate crepe foundation by blending dry and liquid ingredients into a harmonious mixture. Whisk flour, cocoa, sugar, and salt in a vessel, creating a dry base with rich chocolate undertones.
- Create a liquid emulsion by whisking milk, eggs, melted butter, and vanilla extract until completely integrated and glossy. Gently incorporate the dry mixture into this liquid canvas, stirring continuously to eliminate potential clumps.
- Allow the batter to relax and develop depth, permitting the flour to absorb moisture and proteins to unwind, typically requiring 15-30 minutes of restful anticipation.
- Prepare a non-stick skillet by warming it over medium heat and delicately coating with a thin butter layer to prevent adhesion and promote golden edges.
- Pour a precise amount of batter into the heated pan, immediately rotating and tilting to distribute the mixture into a gossamer-thin, circular landscape.
- Monitor the crepe’s transformation, observing its edge lifting and surface setting. Once the underside achieves a delicate golden hue, execute a precise flip, cooking the opposite side briefly.
- Extract the delicate crepe, transferring it to a waiting plate. Interleave each creation with parchment paper to maintain their pristine, separate character.
- Embellish the chocolate crepes with luxurious accompaniments – pillowy whipped cream, vibrant fresh berries, or a cascading chocolate syrup drizzle.
- Elegantly roll or fold each crepe, dusting with a whisper of powdered sugar and additional garnishes to elevate the sensory experience.
Notes
- Resting the batter allows gluten to relax, creating tender and delicate crepes with smooth texture.
- Use a non-stick skillet or well-seasoned cast-iron pan to prevent sticking and ensure easy flipping.
- For gluten-free option, substitute all-purpose flour with almond or rice flour to accommodate dietary restrictions.
- Control heat carefully since chocolate batter burns easily; medium-low temperature ensures even cooking without scorching.
- Prep Time: 10 minutes
- Cook Time: 20 minutes
- Category: Breakfast, Dessert
- Method: Frying
- Cuisine: French
Nutrition
- Serving Size: 4
- Calories: 280
- Sugar: 10 g
- Sodium: 150 mg
- Fat: 11 g
- Saturated Fat: 6 g
- Unsaturated Fat: 4 g
- Trans Fat: 0 g
- Carbohydrates: 36 g
- Fiber: 2 g
- Protein: 8 g
- Cholesterol: 70 mg
Angelina Wiles
Content Editor & Culinary Enthusiast
Expertise
Food Writing and Editing, Vegetarian and Vegan Cuisine, Baking and Pastry Arts, Sustainable Cooking Practices
Education
Portland Community College
Certificate in Culinary Arts
Focus: Emphasis on sustainable cooking practices, vegetarian cuisine, and food writing.
Oregon Culinary Institute
Diploma in Baking and Pastry Arts
Focus: Specialized training in artisanal baking, pastry techniques, and dessert presentation.
Angelina’s love for cooking started with handwritten family recipes and weekend trips to farmers’ markets around Portland. She followed her passion with a Certificate in Culinary Arts from Portland Community College, then perfected her sweet side with a Diploma in Baking and Pastry Arts at Oregon Culinary Institute.
Angelina believes recipes should feel like a conversation, not a science project. She’s all about helping readers trust themselves in the kitchen with simple steps, fresh ideas, and easy twists on classic meals.
When she’s not editing recipes, she’s baking bread, sipping coffee, or getting inspired by the changing seasons.