
Homemade Banana & Pumpkin Chews for Dogs Recipe: Tail-Wagging Treats
My furry companion’s energy peaks when I pull out these delectable banana and pumpkin chews for dogs that combine nutrition with irresistible taste.
Canine treats rarely match such wholesome ingredients and pure delight.
Nutrition experts recommend balanced snacks for our four-legged friends.
Homemade options provide control over every ingredient’s quality and source.
Pups deserve special moments of culinary happiness that support their health and bring tail-wagging excitement.
Simple preparation meets tail-wagging satisfaction in this straightforward recipe.
I promise these chews will make your dog’s day brighter and more delicious.
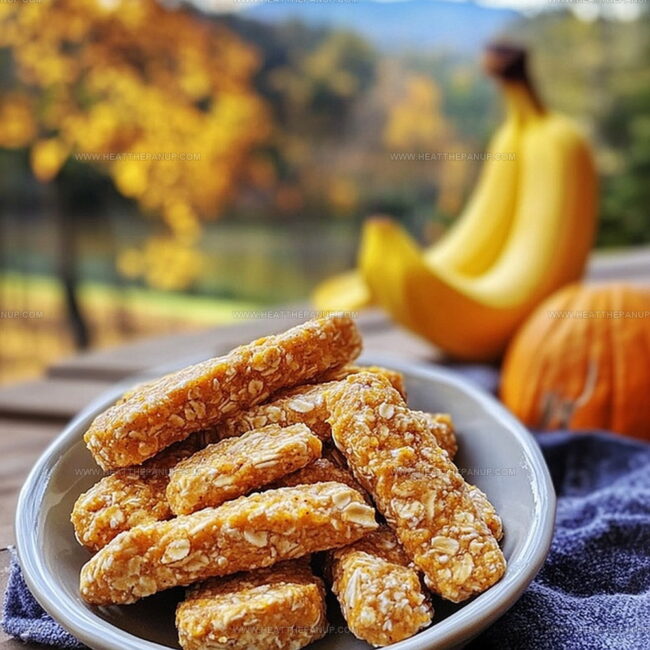
Soft Chews for Dogs with Pumpkin and Banana Flavor
Banana Pumpkin Dog Chews Pantry Breakdown
Main Ingredients:Optional Ingredients:Baking Essentials:Banana and Pumpkin Chews for Dogs Easy Treat Making Steps

Step 1: Warm Up The Oven
Crank your oven to a toasty 300°F and grab a baking sheet. Line it with parchment paper to prevent sticking and make cleanup a breeze.
Step 2: Smash Those Bananas
Take your ripe banana and turn it into smooth, creamy goodness using a fork or potato masher. Keep mashing until no lumps remain.
Step 3: Mix In Pumpkin Puree
Combine the mashed banana with rich, nutritious pumpkin puree. Stir until both ingredients are perfectly blended and look like a happy, orange-yellow mixture.
Step 4: Create The Dough
Gradually add oat flour to your banana-pumpkin blend. Mix carefully until a soft, pliable dough forms. If the mixture feels too wet, sprinkle in a bit more flour.
Step 5: Optional Nutrition Boost
If you want extra goodness, fold in ground flaxseed. This will add some healthy omega-3 fatty acids to your dog’s treats.
Step 6: Roll Out The Dough
Dust your work surface with a light coating of oat flour. Gently roll out the dough to about a quarter-inch thickness.
Step 7: Shape The Treats
Use a cute cookie cutter or slice the dough into bite-sized squares perfect for your furry friend.
Step 8: Bake To Perfection
Place your shaped treats on the prepared baking sheet. Slide into the preheated oven and bake for 25-30 minutes until they turn golden and feel firm.
Step 9: Cool And Store
Let the treats cool completely on a wire rack. Once cooled, store in an airtight container to keep them fresh for your pup’s snack time.
Chew Tips for Banana Pumpkin Dog Treats
How to Keep Banana and Pumpkin Chews for Dogs Fresh
Easy Styles for Banana and Pumpkin Chews for Dogs
FAQs
These chews are generally safe for most dogs, but always introduce new treats gradually and consult your veterinarian, especially for dogs with specific health conditions or allergies.
Puppies over 6 months old can enjoy these treats in moderation. Start with small pieces and monitor for any digestive reactions.
Bananas offer potassium and vitamin B6, pumpkin supports digestive health, and oat flour provides fiber and nutrients. These ingredients can help boost your dog’s overall nutrition.
When stored in an airtight container at room temperature, these chews typically stay fresh for about 5-7 days. For longer preservation, you can refrigerate them for up to 2 weeks.
Print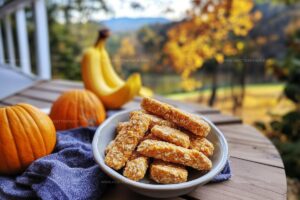
Banana & Pumpkin Chews for Dogs Recipe
- Total Time: 45 minutes
- Yield: 20 1x
Description
Homemade banana & pumpkin chews delight canine companions with nutritious, tail-wagging goodness. Packed with wholesome ingredients and love, these treats offer a healthy snack that dogs will eagerly anticipate during training or as a special reward.
Ingredients
Main Ingredients:
- 1 ripe banana
- 1 cup (240 milliliters) pure pumpkin puree
- 2 cups (240 grams) oat flour
Additional Ingredients:
- 1 tablespoon (15 milliliters) flaxseed
Instructions
- Warm the oven to a low 300°F and prepare a baking sheet with parchment paper for even baking.
- Transform the banana into a silky, lump-free puree using a fork or potato masher.
- Incorporate the pumpkin puree into the mashed banana, stirring until the mixture becomes uniform and creamy.
- Gradually fold the oat flour into the banana-pumpkin blend, kneading gently to create a cohesive dough.
- Adjust the dough’s consistency by adding more flour if it feels overly sticky or wet.
- Integrate ground flaxseed into the mixture, ensuring even distribution throughout the dough.
- Dust a clean surface with additional flour and roll out the dough to a consistent 1/4-inch thickness.
- Use a cookie cutter or sharp knife to craft bite-sized treats, creating uniform shapes for consistent baking.
- Arrange the treats on the prepared baking sheet, leaving small gaps between each piece.
- Bake in the preheated oven for 25-30 minutes, watching for a golden color and firm texture.
- Remove from the oven and allow the chews to cool completely on a wire rack.
- Once cooled, store the treats in an airtight container to maintain freshness for your canine companion.
Notes
- Customize the texture by adjusting oat flour to create softer or crispier chews based on your dog’s preference.
- Experiment with additional dog-safe ingredients like a sprinkle of cinnamon or finely chopped parsley for extra nutritional benefits.
- Ensure ingredients are fresh and at room temperature for better mixing and consistent dough formation.
- Check chews for complete dryness and firm texture to prevent potential moisture that could lead to spoilage.
- Prep Time: 15 minutes
- Cook Time: 30 minutes
- Category: Recipes for Dogs
- Method: Baking
- Cuisine: American
Nutrition
- Serving Size: 20
- Calories: 40
- Sugar: 1g
- Sodium: 2mg
- Fat: 0.5g
- Saturated Fat: 0.1g
- Unsaturated Fat: 0.4g
- Trans Fat: 0g
- Carbohydrates: 8g
- Fiber: 1g
- Protein: 1g
- Cholesterol: 0mg
James Hambly
Founder & Recipe Creator
Expertise
Recipe Development, Culinary Education, Farm-to-Table Cooking, Southern Cuisine
Education
Asheville-Buncombe Technical Community College
Certificate in Culinary Arts
Focus: Hands-on training in professional cooking techniques, emphasizing farm-to-table practices and Southern cuisine.
The Chef’s Academy
Associate Degree in Culinary Arts
Focus: Comprehensive culinary education covering global cuisines, kitchen management, and food safety.
James grew up surrounded by the smells of cast-iron skillets and slow-cooked Southern meals in Asheville, North Carolina.
He sharpened his skills with a Certificate in Culinary Arts from Asheville-Buncombe Technical Community College, and later leveled up with an Associate Degree from The Chef’s Academy.
James’s philosophy is simple: the best meals don’t need fancy tricks, just fresh ingredients, a hot pan, and a little bit of heart. His favorite days are spent testing one-pan wonders, chasing bold flavors, and creating recipes that feel easy, even on a busy night.