
Best Homemade Amish White Bread Recipe for Your Cozy Kitchen
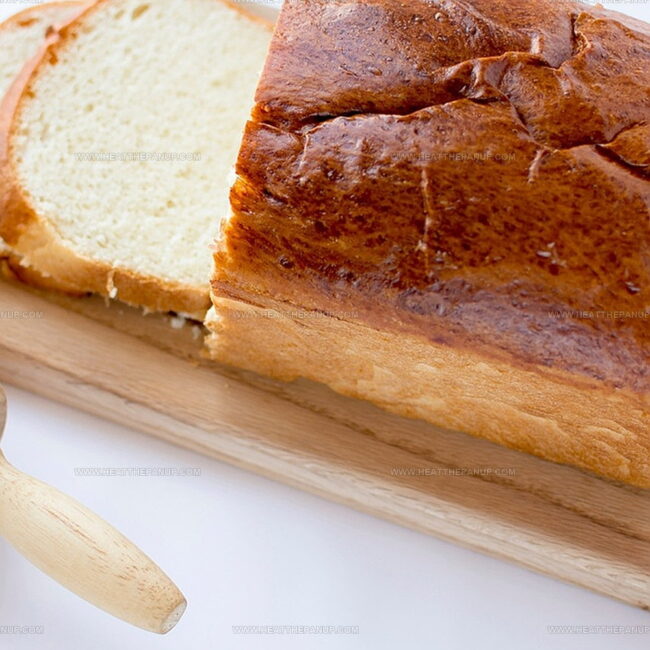
A golden, pillowy homemade amish white bread recipe promises pure comfort from first bite.
Soft loaves emerge from ovens across rural kitchens with delightful simplicity.
Generations have passed down this cherished technique through whispered instructions and loving hands.
Simple ingredients dance together, creating something magical in mixing bowls.
Wheat flour and gentle kneading transform basic components into cloud-like perfection.
Home bakers find profound satisfaction in crafting these tender, warm slices.
Let you slice into tradition and savor every delectable moment.
Why Everyone Loves Amish White Bread
What You Need for Amish White Bread
Wet Ingredients:Dry Ingredients:Leavening Ingredient:How to Make Amish White Bread
Step 1: Activate Yeast Magic
In a spacious mixing bowl, sprinkle sugar into warm water.
Gently add yeast and allow it to bloom and become frothy, creating a bubbly mixture that signals the bread’s upcoming deliciousness.
Wait about 10 minutes until the yeast looks puffy and alive.
Step 2: Create Dough Foundation
Stir in:Gradually incorporate flour, adding one cup at a time, until a soft, pliable dough forms.
Mix thoroughly to ensure all ingredients blend smoothly.
Step 3: Knead with Love
Transfer dough to a lightly floured surface.
Using your hands, knead the dough with rhythmic motions for about 8 minutes.
The goal is a smooth, elastic texture that springs back when gently pressed.
Step 4: First Rise Adventure
Place dough in a greased bowl, rotating once to coat the surface.
Cover with a clean kitchen towel and let rest in a warm, draft-free spot.
Allow the dough to rise and double in size, which typically takes around 1 hour.
Step 5: Shape Bread Loaves
Punch down the risen dough to release air bubbles.
Transfer to a floured surface and divide into two equal portions.
Gently shape each portion into a perfect loaf.
Step 6: Second Rise Preparation
Nestle each loaf into a greased 9×5 inch loaf pan.
Cover and let rise again until the dough doubles, approximately 30 minutes.
Step 7: Bake to Golden Perfection
Preheat oven to 350°F.
Place loaves in the oven and bake for 30 minutes.
The bread is ready when it sounds hollow when tapped and displays a beautiful golden-brown crust.
Step 8: Cool and Enjoy
Carefully remove bread from pans and transfer to wire cooling racks.
Allow loaves to cool completely before slicing, savoring the incredible aroma of freshly baked bread.
Smart Tips for Amish White Bread Success
Save and Reheat Amish White Bread Like a Pro
What to Eat With Amish White Bread
Fun Takes on Amish White Bread
FAQs
Your water might be too hot or too cold. Ideal temperature is between 100-110°F. If water is too hot, it kills yeast; if too cold, yeast won’t activate properly.
The dough should feel smooth, elastic, and spring back when you poke it. Typically, 8-10 minutes of kneading develops the right gluten structure.
Yes, you can. All-purpose flour works well for this recipe. The bread might be slightly less chewy, but it will still be delicious and soft.
Check your yeast’s expiration date, ensure warm environment, and avoid drafty areas. Room temperature around 75-80°F works best for dough rising.
Print
Amish White Bread Recipe
- Total Time: 1 hour 15 minutes
- Yield: 2 1x
Description
Homemade Amish White Bread delivers comfort straight from traditional kitchens, promising golden perfection with each slice. Warm, pillowy loaves invite you to savor simple ingredients that speak of heritage and heartwarming family meals.
Ingredients
Main Ingredients:
- 6 cups bread flour
- 2 cups warm water (110°F/45°C)
Supporting Sweet Ingredients:
- 2/3 cup white sugar
- 1/4 cup vegetable oil
Leavening and Seasoning:
- 1 1/2 tablespoons active dry yeast
- 1 1/2 teaspoons salt
Instructions
- Activate the yeast by combining it with warm water and sugar, allowing the mixture to become foamy and develop characteristic bubbling activity.
- Incorporate salt and oil into the activated yeast mixture, creating a foundational liquid base for the bread dough.
- Gradually introduce flour to the liquid mixture, stirring consistently to develop a cohesive and soft dough with a smooth texture.
- Transfer the dough to a lightly dusted surface and knead methodically, working the gluten until the dough becomes elastic and responsive.
- Nestle the kneaded dough into a greased container, ensuring the surface is lightly coated with oil to prevent drying.
- Allow the dough to rest in a draft-free, warm environment, giving it space to expand and rise until its volume doubles.
- Gently deflate the risen dough, redistributing the internal gases and preparing it for shaping.
- Divide the dough into two equal portions, carefully molding each section into a symmetrical loaf shape.
- Position the shaped loaves into prepared baking pans, allowing them a second rising period to achieve optimal volume.
- Heat the oven to a precise temperature, creating an ideal baking environment for the bread.
- Bake until the loaves develop a golden-brown exterior and produce a hollow sound when tapped, signaling complete internal cooking.
- Extract the baked loaves from their pans and transfer to cooling racks, permitting air circulation to prevent moisture accumulation.
Notes
- Check water temperature carefully to activate yeast perfectly without killing it; aim for warm (around 110°F), not hot.
- Use bread flour for higher protein content, creating a more robust and chewy texture compared to all-purpose flour.
- Brush loaves with melted butter after baking for a golden, shiny crust that adds extra richness and softness.
- For gluten-free option, substitute wheat flour with a commercial gluten-free bread mix, ensuring xanthan gum is included for proper structure.
- Prep Time: 30 minutes
- Cook Time: 45 minutes
- Category: Breakfast, Snacks, Lunch
- Method: Baking
- Cuisine: American
Nutrition
- Serving Size: 2
- Calories: 314
- Sugar: 33 g
- Sodium: 263 mg
- Fat: 8 g
- Saturated Fat: 1 g
- Unsaturated Fat: 7 g
- Trans Fat: 0 g
- Carbohydrates: 58 g
- Fiber: 2 g
- Protein: 9 g
- Cholesterol: 0 mg
Angelina Wiles
Content Editor & Culinary Enthusiast
Expertise
Food Writing and Editing, Vegetarian and Vegan Cuisine, Baking and Pastry Arts, Sustainable Cooking Practices
Education
Portland Community College
Certificate in Culinary Arts
Focus: Emphasis on sustainable cooking practices, vegetarian cuisine, and food writing.
Oregon Culinary Institute
Diploma in Baking and Pastry Arts
Focus: Specialized training in artisanal baking, pastry techniques, and dessert presentation.
Angelina’s love for cooking started with handwritten family recipes and weekend trips to farmers’ markets around Portland. She followed her passion with a Certificate in Culinary Arts from Portland Community College, then perfected her sweet side with a Diploma in Baking and Pastry Arts at Oregon Culinary Institute.
Angelina believes recipes should feel like a conversation, not a science project. She’s all about helping readers trust themselves in the kitchen with simple steps, fresh ideas, and easy twists on classic meals.
When she’s not editing recipes, she’s baking bread, sipping coffee, or getting inspired by the changing seasons.